Showing posts with label Tutorial. Show all posts

Wednesday, May 25, 2011

DIY (SIN)spiration #1


There are just too many things that are so DIY-able, its sinful. Why use the rent money on a new pair of shoes, when it can be made in a day for $3? Yeah, I thought so....
Here is this week's (SIN)spiration:
 Christian Louboutin Glitter Pumps: 



Now, That bad boy retails at a financially crippling (if you're a college kid like me) $795.
Here's the alternative (Which will cost you less than $40):
.
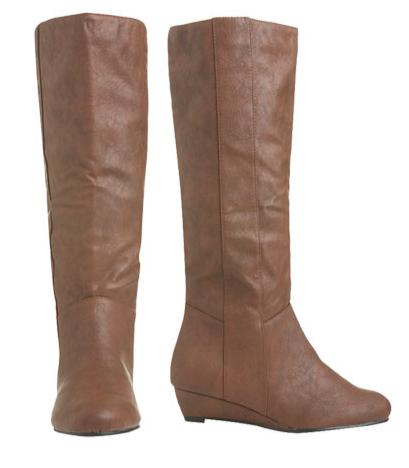
First you need some pumps shaped similarly to the ones above. Something like these:


You'll also need:
Loose glitter
Outdoor Mod Podge (for water resistance)
Paint brushes
A disposable container

1. Mix the Glitter with the Modge Podge in the disposable container (This ensures that the glitter stays put when you put it on the shoe. Be sure to mix in a lot of Glitter!!)
2. Use the paintbrush to paint the glitter mixture onto the shoes.
3. Let dry
4. Inspect the shoes. Fill in any missed spots and let dry again.
5. Paint a final thin layer of Modge Podge on the shoes, let dry and WEAR THEM!!

This techinque was developed by Annie Spandex, check her out!!

Sunday, May 15, 2011

DIY The Look: Lesson 10


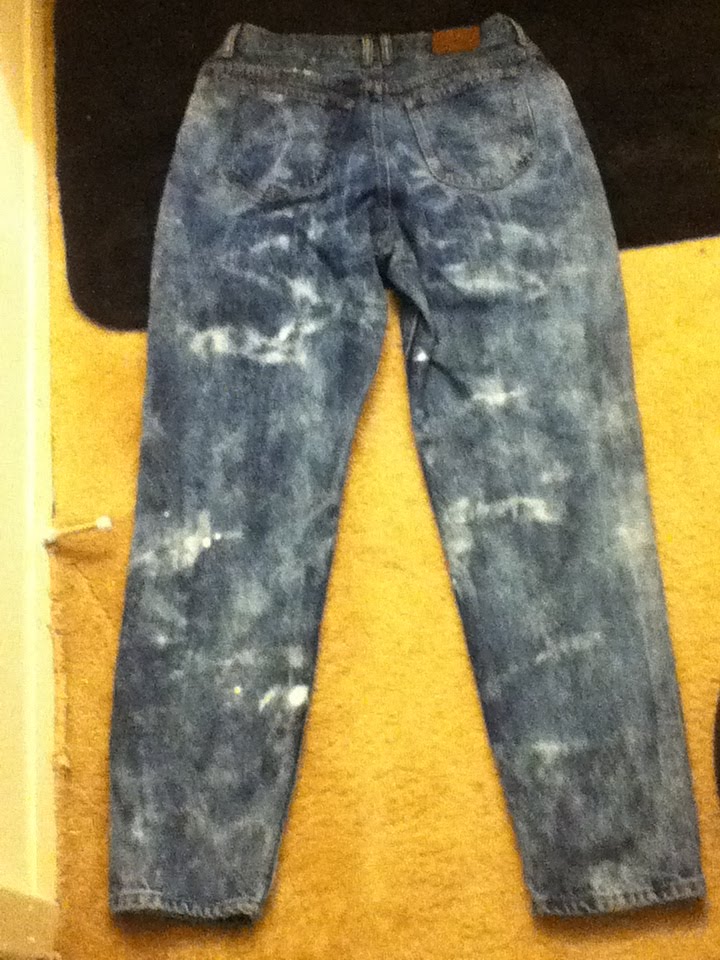
Hey folks!!! After, Like, a year I'm back!! Here's my latest projects as published.


Here's how to do it:
Materials:
Bleach
Bowl
Paint Brush (The bigger the better)
Scrubbing Brush

Uh, your JEANS?

First you need to dampen your jeans. Pour some bleach into a bowl to get started....
Lay your jeans out on a surface that won't be affected by bleach. Take your scrubbing brush and "scrub" both sides of both of the legs of your jeans. Let it sit until the jeans are 2-3 shade lighter than before. Rinse them and survey the damage your work.
Like it? Good! You are ready to bleach!!
Here are the two techniques I used:
Splatter:


This one is simple: Just dip the paintbrush in bleach and "throw" the bleach onto the jeans (using the paintbrush) as you would if you were splatter painting. Let it sit until you see white. 

Tie dye:
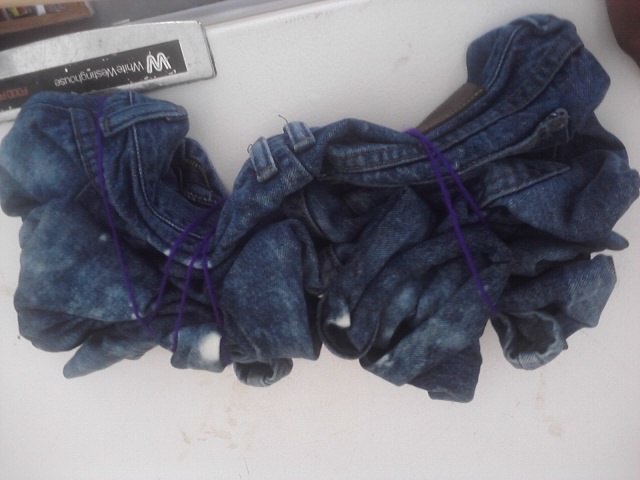
To do the tie dye technique I scrunched the legs of my jeans up like this:

 
Then using my paintbrush, I painted the exposed fabric with bleach. After this, I let it sit for ten minutes, turned the jeans over and let sit for another ten minutes. When I was satisfied with the color, I rinsed the bleach out.

Wash your jeans and wear them =)


Monday, March 28, 2011

Tired of My Jeans Wearing Out!! (How to keep those jeans living long!)

I AM SOOO TIRED OF MY JEANS WEARING OUT!!!


I can only blame myself for buying cheap jeans that probably wouldn't last to long in the first place, but can't a sista' get a little longevity? I've decided to go ahead and thrift the next set I'm buying so that I can buy the better quality brands. But in the mean time, I was looking for ways to increase the life span of my jeans and I found this suggestion in a forum:

"May I suggest that you try to get as much life as possible life out of your cloth by altering your washing procedure?
Here's my rules for washing denim:
1) Wash only when you absolutely have to. I wash my jeans maybe once a month in the summer and stretch it out longer in the winter, maybe once every four months. This may sound gross, but I let my pants hang up between washings so they can air out, it keeps them reasonable for public occasions. A cold water soak (no detergent or agitation) can do wonders also.
2) When I must wash, I wash them inside-out cold water in Woolite Dark Colors detergent on gentle. Some argue that you shouldn't put them on spin, I'm not quite that hard core.
3) Never, ever put them in the dryer. Let them air dry.
I can keep a pair of Levi's going for 2 years using this procedure, and my APC's still look brand new."

Some other suggestions included smearing all-purpose glue on the area that is most susceptible to wear, or sewing on iron-on patches (then ironing the area). I'm Trying all of these!! going to get around to trying some of these techniques.
How do you keep your jeans alive?
 

Friday, August 06, 2010

What I've been up to these days


1. Cutting up sweaters:


Yep I finally got around to that Slit Sleeve project I posted a while back

Note: My room is usually nice and organized, but I'm packin'  for college and so the room looks like the twilight zone, thus the messy backdrop, forgive me.

2. Shopping for school:

Got these for about $22 at Wet Seal

Cost me EXACTLY 1cent(At Wet Seal, mind you!)
BEST DEAL EVAR!!!!

Hmmmm and thaz it!!
^.^

Tuesday, July 27, 2010

Friday, July 23, 2010

DIY the Look: American Apparel Edition pt 1 ((RESULTS))


I used a really old Black turtle neck:


I'm currently making another one as I post this........
Tutorial  HERE

Wednesday, July 21, 2010

DIY Fringe scarf (Super Easy!!!)


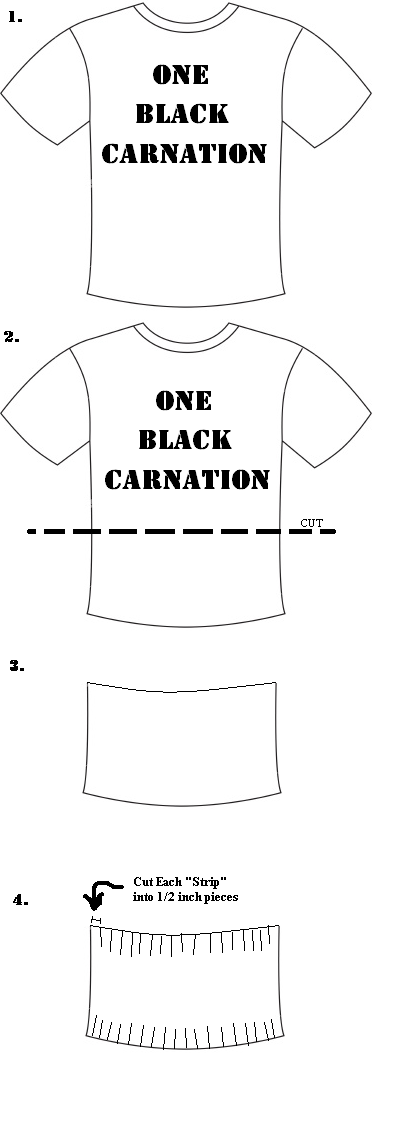
All you need to make this is a T-shirt and some scissors:

Got 'em?

Great, Peep the instructions:


Tip: Pull each strip so that they can curl up.

Wear your new creation!


Tuesday, July 20, 2010

DIY the Look: American Apparel Edition pt 1.


American Apparel Acid Wash Scarf
So I saw this scarf while scroll shopping on the American Apparel page.....
Oh American Apparel!
What's a sista to say about you?
That your $40 dresses cost me $3 or less to make?
That I can make most of the stuff in you in less than 1 hour? Alas, the musings are endless!
But seriously, American Apparel was the original inspiration behind the whole DIY the look series. Before I started blogging, my home gurl Roro and I would troll the shop nearby our school and I would marvel at how much stuff I could totally make at home. Then I started noticing the same thing in other stores. Then I found tons of fabric........

The rest is history.

Anyway, on to the DIY:

Heres what you'll need:
1 T-shirt
Bleach in a bowl
Scrub brush
Rubber gloves
Scissors

1. Wet your t-shirt and ring out some water.
2. Dip the brush into the bleach and let any excess drain off
3. In a slashing motion, lightly "scrub" random areas of your shirt, until you have "scrubbed" every section of the shirt.
4. Let it soak, and check for color change until you are satisfied.
5. Wash and dry.
6. Cut the bottom of the shirt using the following instructions:


DONE!!!
Hey, keep the top piece as a cropped top! Layer it with some t-shirts, or wear it just so!

Btw, you will be seeing quite a few more of these American Apparel DIYs, at least until I find somewhere else to pick on.......

Peace!

Tuesday, June 08, 2010

Five minute Dress!!


Got an old tee lying around? Turn it into a dress in five minutes! (Click Here)

Wednesday, June 02, 2010

Diy Hair Accessories


Ladies, get your glue gun ready, Elle magazine has 4 runway-inspired hair accesories DIYs. I loved them so much, I just had to post it! Click here for details!

Btw, the laptop is back....still messed up, but back......


Monday, May 17, 2010

DIY the look: 30 minute necklace


Sorry for the absense! My laptop is SHOT, and until I get a new one, things might be a lil shaky, so I'll just go ahead and apologize ahead of time =). On to the post:


You can make that in 30 minutes!!! Click Here for a tutorial!
Now I know the tutorial calls for some sewing machine, but if you want, you can make the "chain" longer, knot the ends and a bow at the back to wear it a different way!


Monday, March 15, 2010

DIY The Look: Lesson 2


To get this look all you need is a top that doesn't have any graphics on it, the desired image (Reversed), a Printer, Iron-on transfer paper, Scissors, and an Iron.

1. Test the image by printing on regular paper first.
2. If necessary, resize the image so that it fits on one sheet of  paper.
3. Put transfer paper into the printer and print image again.
4. While the picture prints lay the top on an ironing board as you would when ironing it.
5. Place a piece of paper under the spot you plan to put the iron on to prevent bleeding.
6.  Place the transfer on the top with the image facing the fabric
7. Iron the transfer on following transfer paper package directions.

Tip: To help the transfer last longer, outline the transfer with fabric paint.

Oh, and don't forget send a pic of your masterpiece!


Monday, March 08, 2010

DIY The Look: Lesson 1


As you can see, the slit sleeve pullover is $350, but you can totally make it yourself!


To get that awesome sweater just follow these simple instructions:
1. Mark the spots you plan to cut
2. Cut The spots you marked
3. Wash The sweater
4. Wear it and send a pic on over!


Sunday, January 31, 2010

No Sew Fringe T-shirt dress (And Variations)!


So here are my plans for my most recent project, a no sew t-shirt dress:
(Instructions follow the blueprint)
Not into fringes? No Problem click here for an alternative.


For this design, I'd reccomend a t-shirt that hits you either midthigh or somwhere by the knees, unless you plan to wear it with jeans or tights.

Instructions:

1. Cutting approximately 1 cm away from the seam, remove the neckline and sleeves from the shirt (Keep 'em around, never know what you can do with 'em!)
2. Cut open both sides of the t-shirt.
3. If you are a stickler for accuracy, put the t-shirt on and pin the sides and adjust until the fit satisfys you.
4. Cut "V" shaped notches along the sides of the shirt.
5. Tie the strips together and "Viola!" A fringe dress.

For cap sleeves:

Don't cut off the sleeves entirely, in step one, fold the shirt in half, cut half of the sleeve off. When cutting the notches for the fringe, cut the notches into the sleeve as well.

Btw, This pattern is also nice for any t-shirt, I just like making dresses =3
Update on the project results soon


Saturday, January 30, 2010

How To Finger Knit! (Update)

I used the finger knitting technique to make a chunky bracelet, peep the results:


I like it!!


How To Finger Knit!

I was knitting the tradtional way when I wondered if knitting can be done by finger. So I hit google to find answers and after modifying my keywords a couple of times, I can across a video that shows you how to finger knit and I decided to try it.

Its ridiculous how easy it is to finger knit! I may scrap my tradtional knitting........

Here is how mines is coming along:

Cast on
Front

Back (Ain't it purrty?)

This can be used to make Knitted belts, Bracelets, Headbands, Wristbands, Mini scarfs, or anything else you can think of!!

And so with that said here is a video instructional:


Enjoy!!!


Wednesday, August 12, 2009

Project #2: Distressed Jeans

Here's a detailed tutorial from Jeans and Accessories [.com] (Click here)

This page includes how to dye jeans, and also, how to bleach, and stain jeans! Chop chop!!

Want to know how to decorate your newly distressed jeans? Stay tuned!


Monday, August 10, 2009

Tutorial #2: T-shirt Dress


So I was looking for inspiration for a dress made out of a t-shirt and I happened across this tutorial. I will be trying this very soon!

A couple of tips:
a) Try using a wife beater or a plain tank instead of a t-shirt.
b) Decorate with studs, or stencils!
c) Use bright colors


LinkWithin

Related Posts with Thumbnails